
Before I share my craft, I wanted to share this little gem for the 'Hey Girl' link up over at Decor and the Dog!

If you haven't seen any of the 'Hey Girl' memes, please check them out...they're hilarious! This pin board has a ton! Now onto my craft...
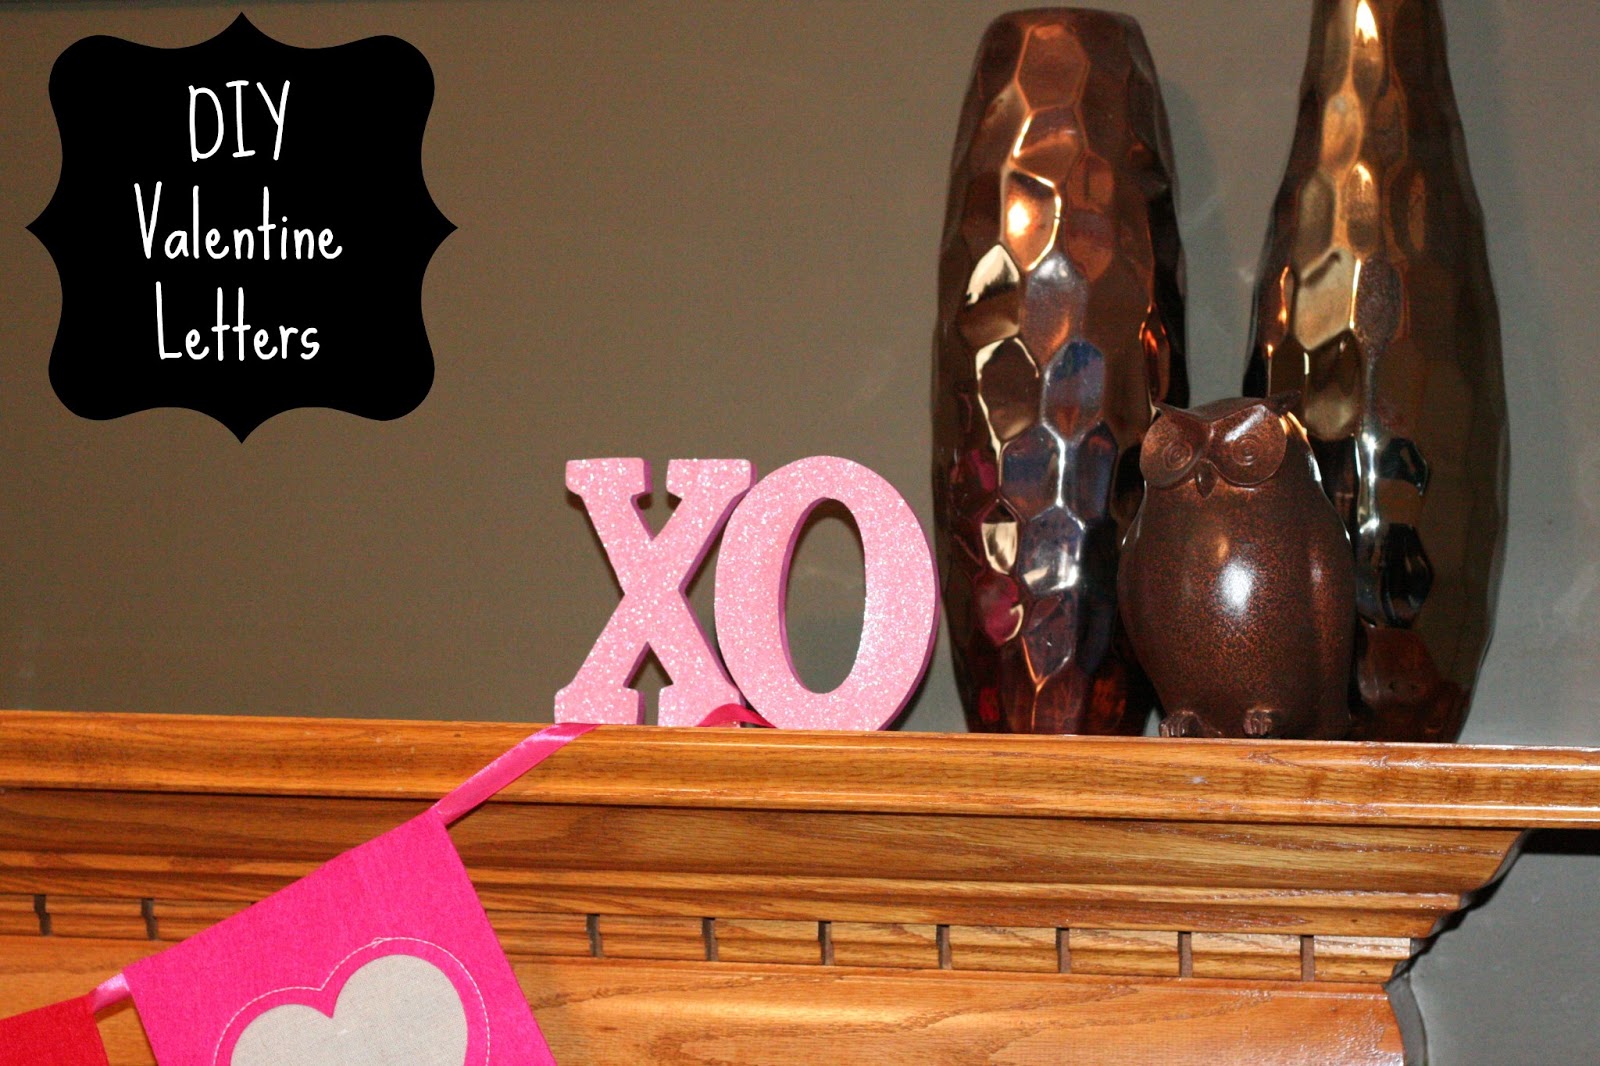
Remember earlier this week when I posted my Valentine's decor? I know you all loved it but I also know you were all thinking my poor mantel looked awfully empty, right? I couldn't figure out what to add. I was so proud of my
Last year when I was pregnant, I made this name art for Carson's nursery. (It's currently hanging over his crib.) All I did was use mod podge to attach scrapbook paper to wooden letters from Michael's. I also painted the edges of the letters for a uniform look. Then I attached the letters to the glass. Since I already knew how easy it was to cover some letters with paper, I went with that idea.

Valentine's Day obviously makes me think of love and hearts. My inspiration for this project was a bunch of pins on Pinterest of different "XO" projects. (See the pins below.)
Wooden (or MDF) letters
Craft paint & paint brush
Mod Podge & sponge brush
Scrapbook paper
How to Make
Paint the edges of your wooden letters the color of your choice. I originally planned on using a pink sparkly paint but it was very translucent so I decided to use some craft paint I already had. Here you can see the difference between the paints. The fronts of the letters are the glittery paint and the sides are the craft paint.

Once your letters dry, trace them (front side down) onto the back of your scrapbook paper and cut out the letters. Using Mod Podge (or probably any glue), paint the fronts of your letters with your sponge brush and stick your paper on! Here is my completed O so you can see the difference.

Here's my final product. My letters found a home on my mantel and I think it looks much more complete now!
*Note: If you choose to use normal paper (instead of glitter paper), you might want to add a layer of Mod Podge over the top to give it an extra seal. I did this with the name art for Carson's nursery.


Here is my before & after...sorry for the crooked picture!

Some of my "Pinspiration":


I'm linking up with a few lovely ladies this week:


Carson the ladies man. Too cute! Thanks for joining!
ReplyDeleteSo cute!
ReplyDelete-Shelley
I think I XO that cute baby, but my butt won't fit in that space in the cart no matter how much chocolate he offers me!
ReplyDeleteBliss
So cute! :)
ReplyDeletexo
What a sweet craft, and your little man does look like he's scooting over and making room! So sweet! :)
ReplyDeleteLove your thoughtful little dude! Great crafts, too!
ReplyDeleteLinking from Bliss Ranch,
Ricki Jill
LOVE these! So wish I was crafty -these are awesome!
ReplyDeleteCute idea and so simple!
ReplyDeleteJill
Classy with a Kick
That's a cute idea!
ReplyDelete